Physical Address
304 North Cardinal St.
Dorchester Center, MA 02124
Physical Address
304 North Cardinal St.
Dorchester Center, MA 02124
Are you tired of staring at that spinning circle on your Windows 11 login screen, waiting what feels like an eternity for your PC to boot up? You’re not alone. Slow startup times can turn a quick task into a frustrating ordeal, especially when you’re in a rush to get work done or jump into your favorite game. Whether it’s due to accumulated junk, unnecessary programs hogging resources, or outdated software, a sluggish boot can make even the most powerful machine feel outdated.

The good news? You don’t need to be a tech wizard to fix it. In this comprehensive guide, we’ll dive deep into why Windows 11 might be taking its sweet time to start and provide step-by-step solutions to speed things up. We’ll cover everything from simple tweaks to more advanced optimizations, all based on proven methods that can shave seconds or even minutes off your boot time. By the end, your Windows 11 PC could be booting faster than ever. Let’s get started!
Before we jump into the fixes, it’s helpful to know what’s causing the problem. Windows 11 is a robust operating system, but like any software, it can slow down over time due to various factors. Here are the most common culprits behind slow boot times:
Understanding these issues will help you target the right fixes. Now, let’s move on to the solutions. We’ll start with the easiest ones that often yield the biggest improvements.
One of the quickest wins for speeding up Windows 11 boot time is managing what launches automatically. Many programs sneak into your startup list during installation, and disabling the non-essentials can dramatically reduce load times. According to experts, this alone can cut boot times by 20-50% on cluttered systems.
Startup apps compete for resources during boot, causing delays. By limiting them, Windows can focus on essential tasks like loading the desktop and core services.
For example, if you have apps like Spotify or Adobe Creative Cloud set to auto-start but rarely use them right away, turning them off can make a noticeable difference.
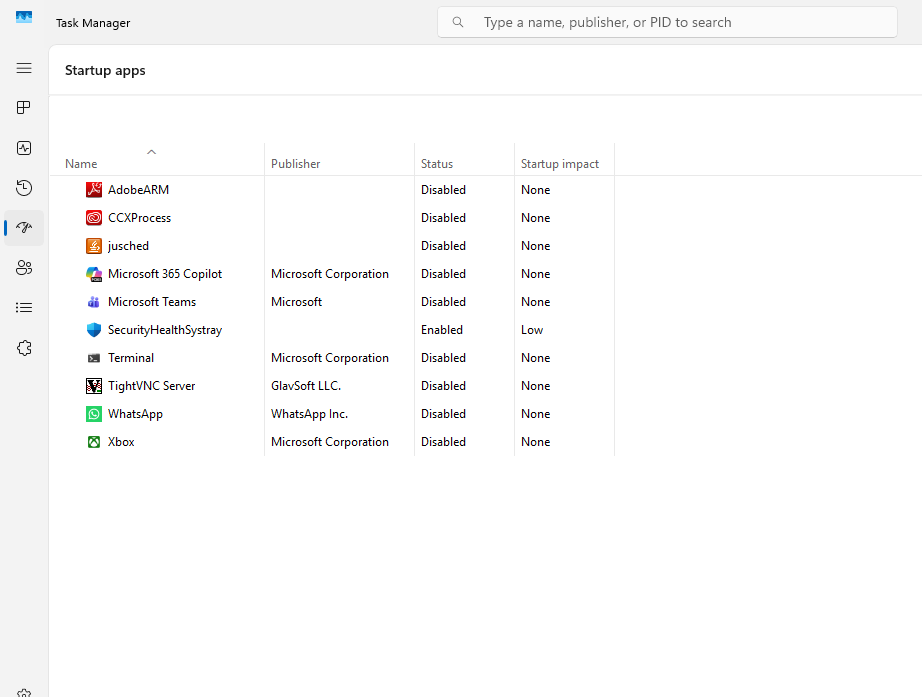
Pro Tip: If you’re unsure about an app, search its name online to see if it’s safe to disable. Repeat this process periodically as new apps might add themselves.
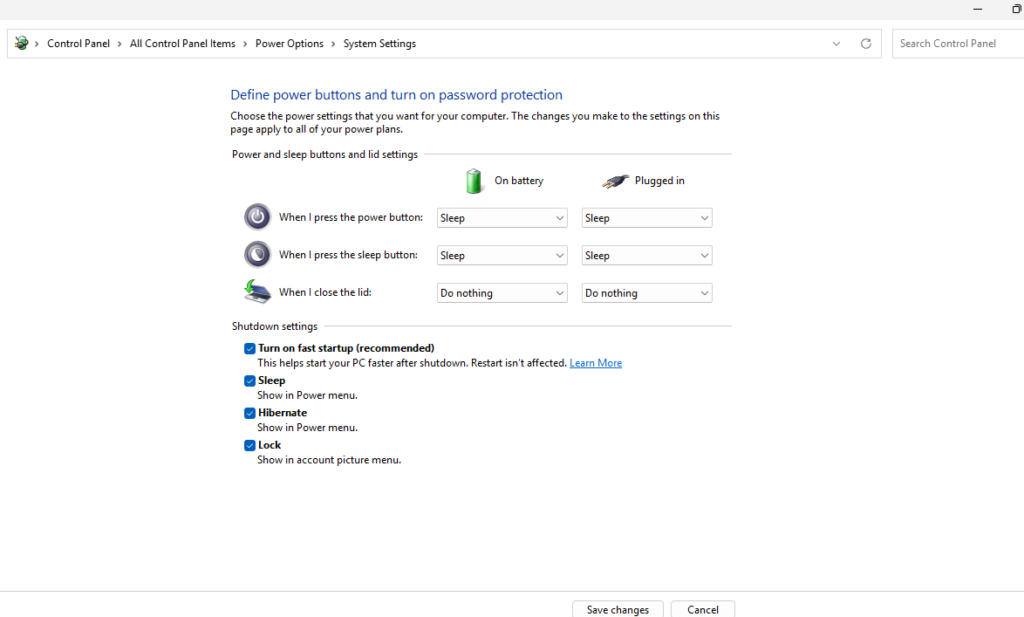
Windows 11 has a built-in feature called Fast Startup (also known as Hybrid Boot) that combines elements of shutdown and hibernation to speed up boot times. It’s often disabled by default on some systems, especially laptops, to save battery. Enabling it can reduce startup from over a minute to under 30 seconds.
Fast Startup saves your system’s state to a file on shutdown, allowing quicker resumption. It’s particularly effective on SSDs but works on HDDs too.
Note: If you dual-boot with another OS or frequently update drivers, Fast Startup might cause issues consider disabling it then.
Potential Drawback: It might interfere with some updates or hardware changes, so if you notice problems, toggle it off using the same steps.
A cluttered drive is a slow drive. Temporary files, old updates, and junk accumulate over time, forcing Windows to sift through more data during boot. Running Disk Cleanup or Storage Sense can reclaim gigabytes and boost performance.
Low free space means slower read/write operations, especially on the system drive (usually C:). Cleaning it optimizes disk access during startup.
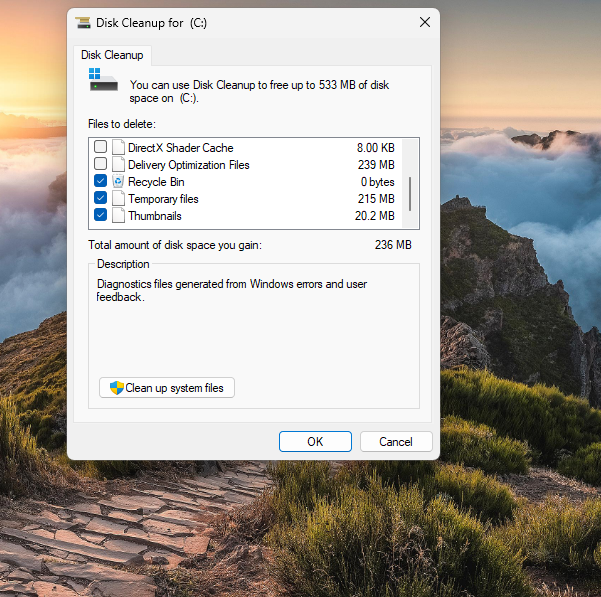
For a more modern approach:
If you’re on an HDD, also defragment: Search for “Defragment and Optimize Drives,” select your drive, and click Optimize. Skip this for SSDs, as it can shorten their lifespan.
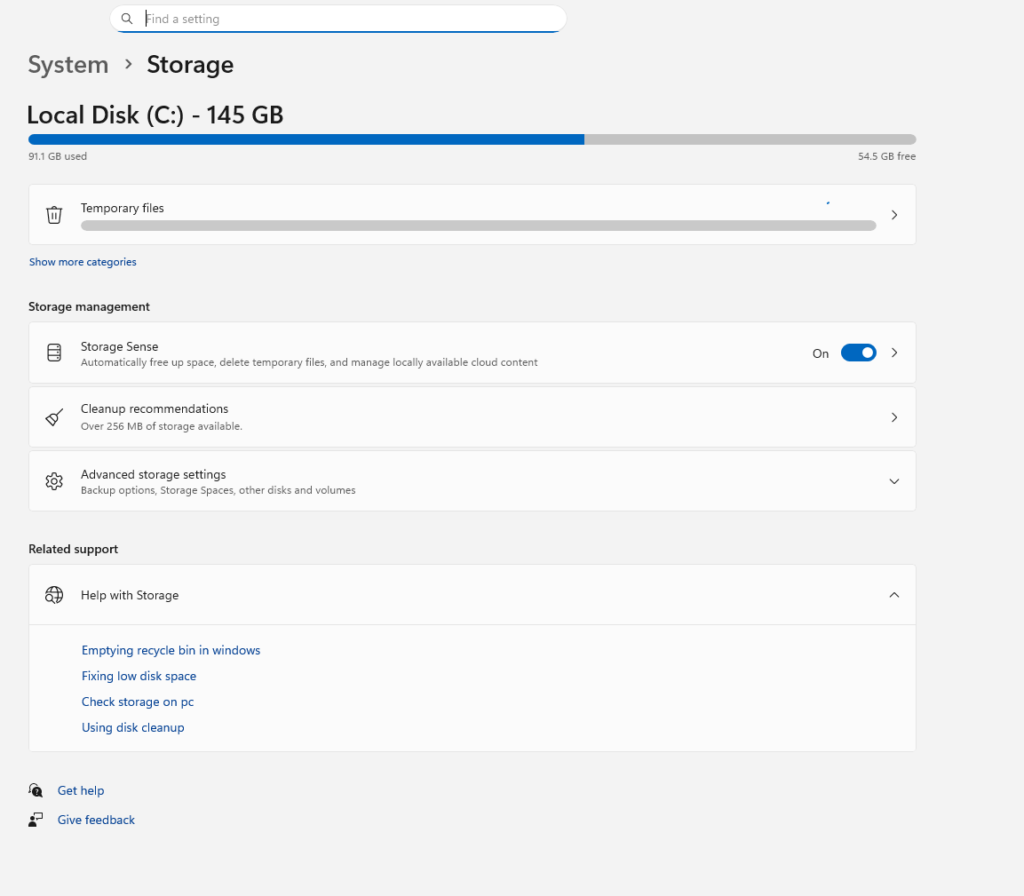
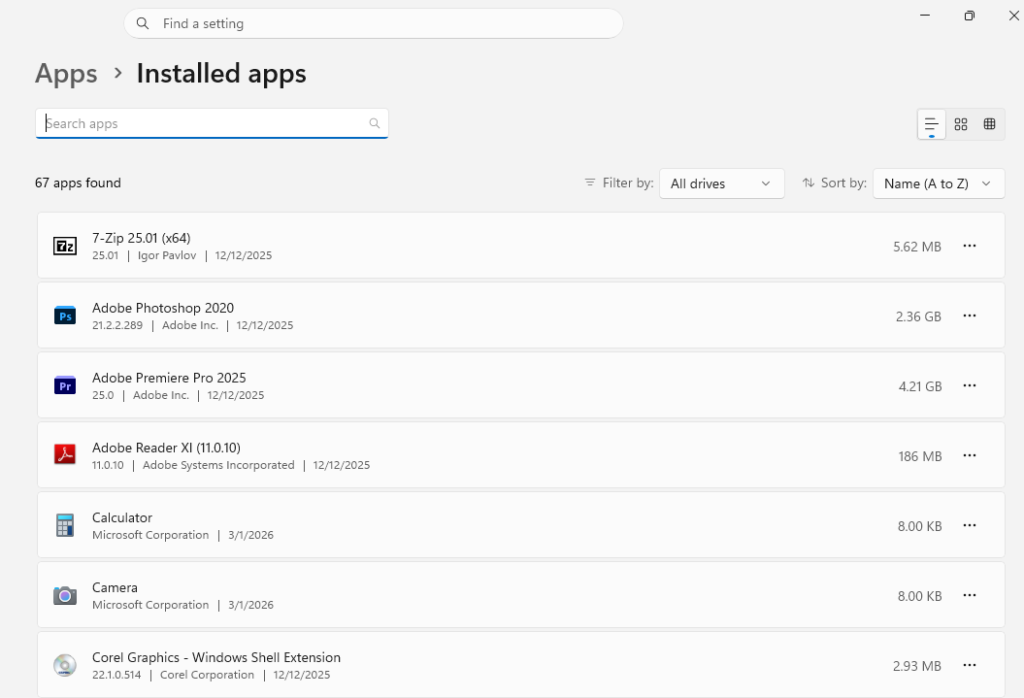
Aim to keep at least 20% of your drive free. If space is critically low, consider uninstalling unused apps via Settings > Apps > Installed apps.
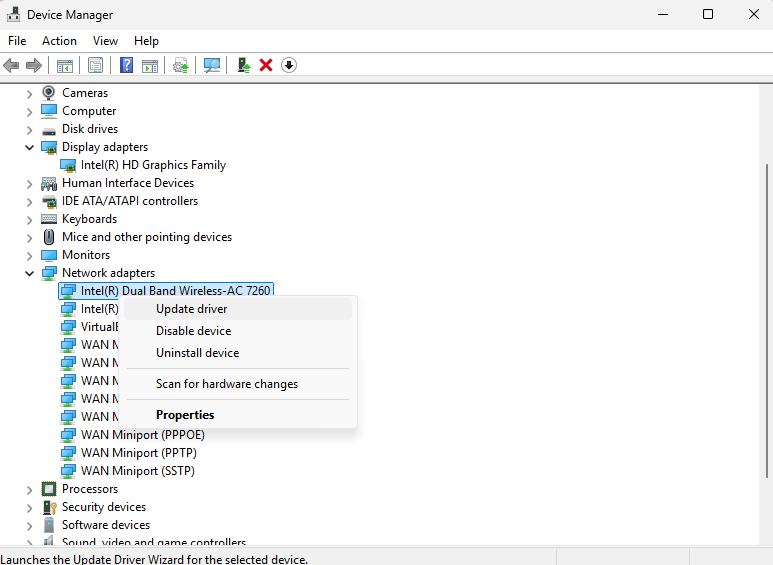
Outdated software is a common cause of slowdowns. Microsoft regularly releases updates that fix bugs and improve boot efficiency, while updated drivers ensure hardware compatibility.
Updates patch performance issues and optimize code for faster loading. Old drivers can cause conflicts, leading to longer boot sequences.
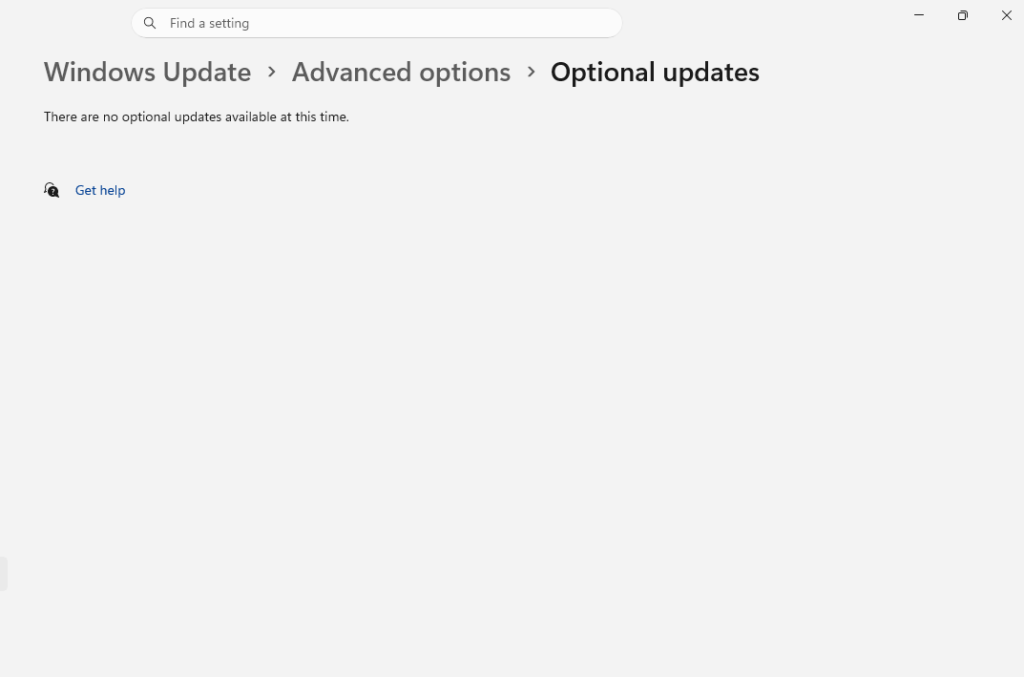
Alternatively, use Device Manager:
Restart after updates to apply changes.
Pro Tip: Enable automatic updates in Settings to stay current without manual checks.
Windows 11’s sleek animations and transparency effects look great but can slow down older hardware during boot and general use. Tweaking them prioritizes speed over style.
Visual effects use GPU and CPU resources. Disabling non-essentials frees up power for faster loading.
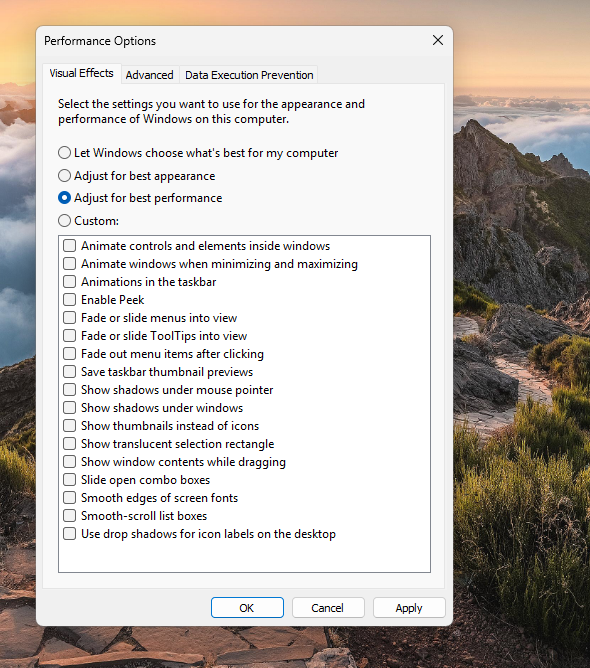
You’ll notice a plainer interface, but boot times should improve.
If you miss the visuals, you can always revert to Let Windows choose or Adjust for best appearance.
If the above doesn’t fully resolve your issue, try these deeper optimizations:
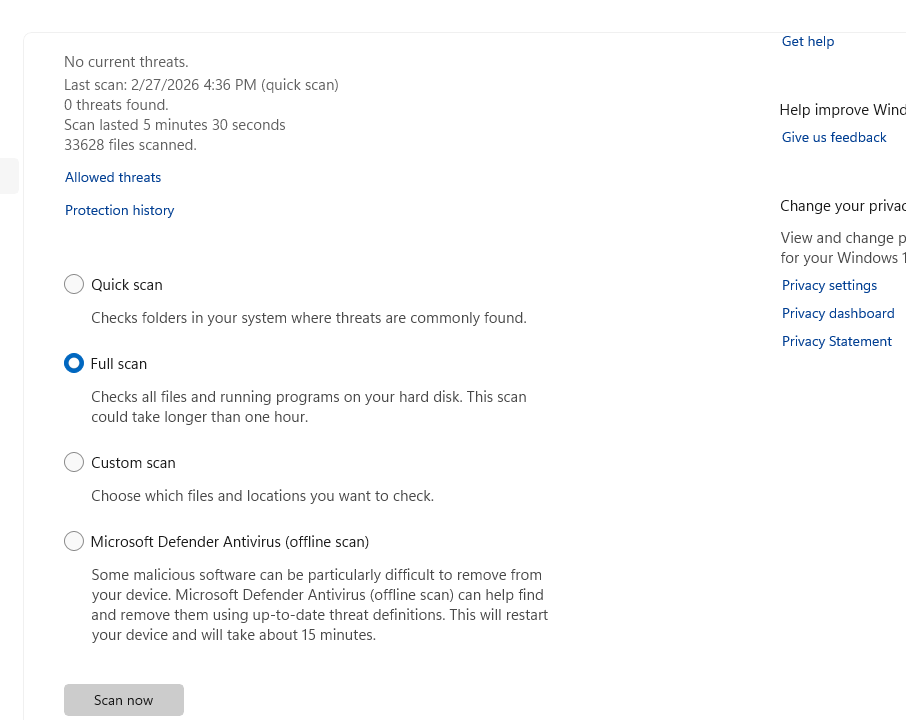
Use Windows Security: Go to Settings > Privacy & security > Windows Security > Virus & threat protection > Scan options. Run a full scan. Malware can hijack startup processes.
In Power Options (from Control Panel), select High performance. This maximizes speed but uses more power great for desktops.
Go to Settings > Apps > Installed apps and remove pre-installed junk like Candy Crush or unused Microsoft apps.
If software tweaks aren’t enough, consider hardware:
In Settings > System > Notifications, turn off unnecessary ones. Also, disable Suggestions in Privacy settings to reduce background activity.
In Task Manager, right-click resource-heavy processes and select Efficiency mode to throttle them.
A simple restart clears temporary glitches. Avoid just sleeping your PC if boot issues persist.
To track progress, note your current boot time using Task Manager (Startup tab shows Last BIOS time) or third-party tools like BootRacer. Test after each change and compare.
Slow Windows 11 startup doesn’t have to be a permanent headache. By disabling startup apps, enabling Fast Startup, cleaning your disk, updating everything, and tweaking visuals, you can achieve lightning-fast boots. Start with the basics and work your way through if hardware is the issue, an upgrade might be worthwhile.
Remember, maintenance is key: Regularly apply these tips to keep your PC snappy. If problems persist, it could be a deeper issue consider consulting a professional or checking Microsoft’s support forums.
Has this guide helped speed up your Windows 11? Share your before-and-after boot times in the comments below!
On an SSD, 10-30 seconds is normal. On HDDs, up to a minute. If longer, optimization is needed.
Yes, for most users, but it can cause issues with dual-booting or frequent hardware changes.
Absolutely focus on disabling non-essentials while keeping core Windows functions intact.
Check for hardware faults, run SFC /scannow in Command Prompt (admin), or consider a clean Windows reinstall.
Indirectly, yes, by handling more processes efficiently during startup.