Ultimate Guide to Windows 11 Privacy Settings: What They Are and How to Change Them (2025 Edition)

Windows 11 settings

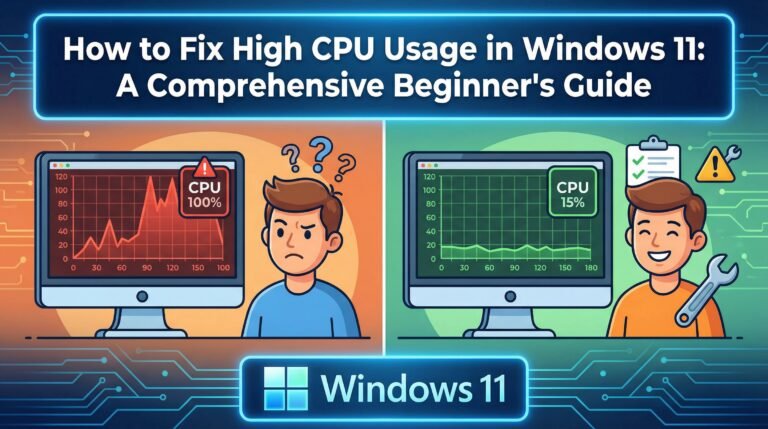
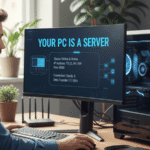
Hey there! If you’ve just installed Windows 11 on your PC, congratulations—you’re stepping into a sleek, modern operating system packed with features. But out of the box, Windows 11 comes with some default settings that might not suit everyone. They could drain your battery, invade your privacy, or just make things feel a bit clunky. Don’t worry; tweaking these is super easy, even if you’re a total beginner. In this guide, we’ll walk through the best Windows 11 settings to change after installation to optimize performance, boost privacy, and customize your experience. These tips are based on the latest updates as of 2025, so let’s dive in and make your setup feel like home.

Whether you’re upgrading from Windows 10 or starting fresh, changing these Windows 11 tweaks can save you time, improve security, and enhance usability. I’ll include simple step-by-step instructions for each one. Ready? Let’s get started!

What Are Privacy Settings in Windows 11?

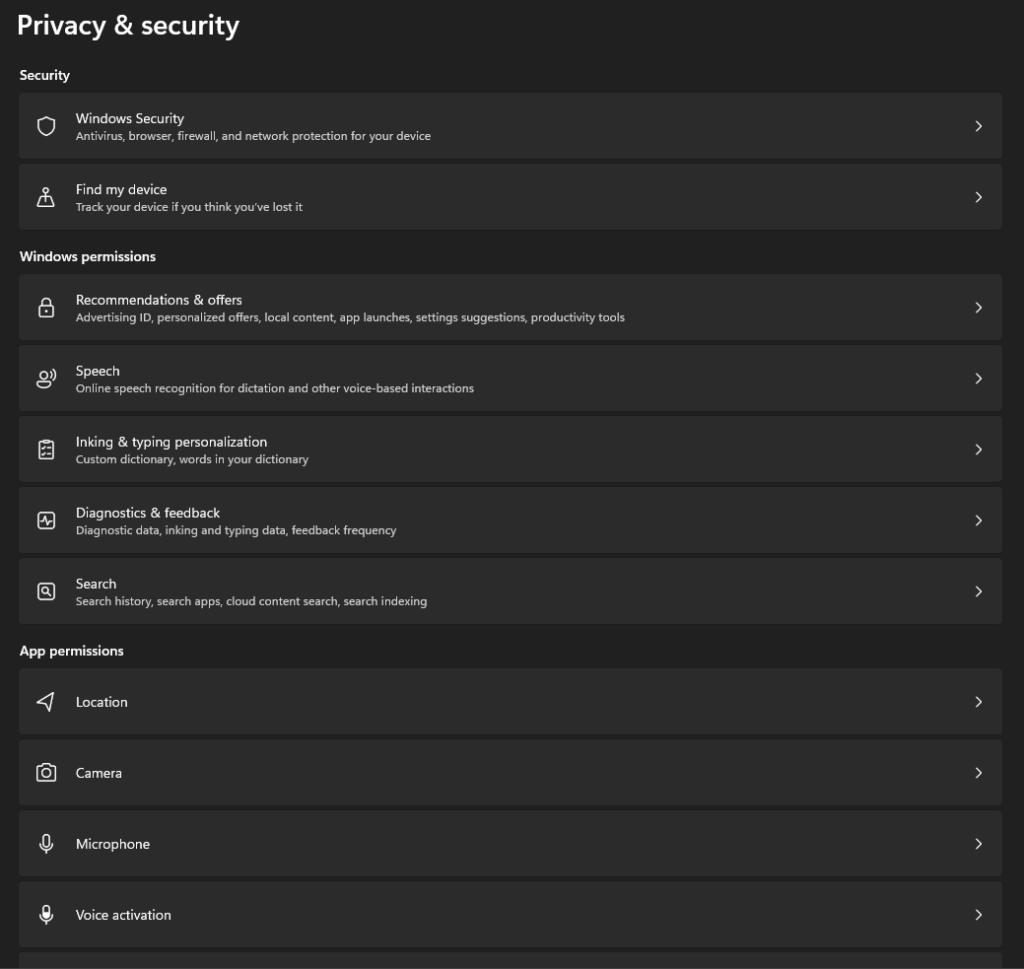
First things first: Privacy settings in Windows 11 are a collection of options that control how your device collects, uses, and shares your personal data. Microsoft designed these to balance features like personalized recommendations with user control, but out of the box, many are set to “on” for convenience. This means your PC might send info like your location, app usage, or even voice samples to Microsoft servers.

Key areas include:

  • General privacy: Controls advertising IDs and basic tracking.
  • App permissions: Decides what apps can access your camera, mic, location, etc.
  • Diagnostics and feedback: Handles error reports and usage data sent to Microsoft.
  • Account info and more: Manages sync settings and personalized experiences.

Why care? In 2025, with rising concerns about data breaches and AI integrations (like Copilot), adjusting these Windows 11 privacy options helps protect against unwanted tracking, targeted ads, and potential security risks. Plus, it can even improve battery life by reducing background data usage.

Pro tip: Always review these after a fresh install or major update, as settings can reset.

1. Adjust Privacy Settings to Protect Your Data

Privacy is a big deal in Windows 11 settings, and Microsoft collects a lot of data by default. Turning off unnecessary tracking can make your system feel more secure without sacrificing functionality.

  • Why change it? Default settings share your location, app usage, and even handwriting data with Microsoft.
  • How to do it:
    1. Click the Start button and search for “Privacy & security.”
    2. Under “Windows permissions,” go through sections like General, Speech, Inking & typing personalization, and Diagnostics & feedback.
    3. Toggle off anything you don’t need, like “Let apps use my advertising ID” or “Send optional diagnostic data.”
    4. In “App permissions,” review and disable access for things like Camera, Microphone, and Location if you’re not using them.

This quick Windows 11 privacy tweak takes just a few minutes but gives you peace of mind.

Privacy Settings

2. Disable Unnecessary Startup Programs for Faster Boot Times

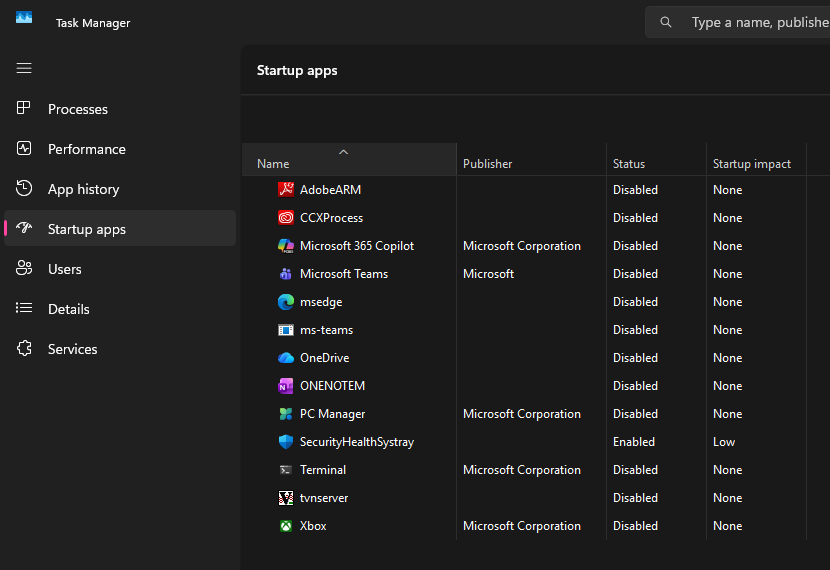
One of the most annoying things after a fresh install is a slow startup. Windows 11 lets apps run in the background right away, hogging resources.

  • Why change it? It speeds up boot times and frees up RAM for what you actually use.
  • How to do it:
    1. Right-click the taskbar and select “Task Manager” (or press Ctrl + Shift + Esc).
    2. Go to the “Startup” tab.
    3. Right-click on apps you don’t need at startup (like OneDrive if you don’t use it often) and choose “Disable.”

Pro tip: If you’re on a laptop, this Windows 11 startup optimization can also extend battery life.

Startup

3. Customize the Taskbar for a Cleaner Look

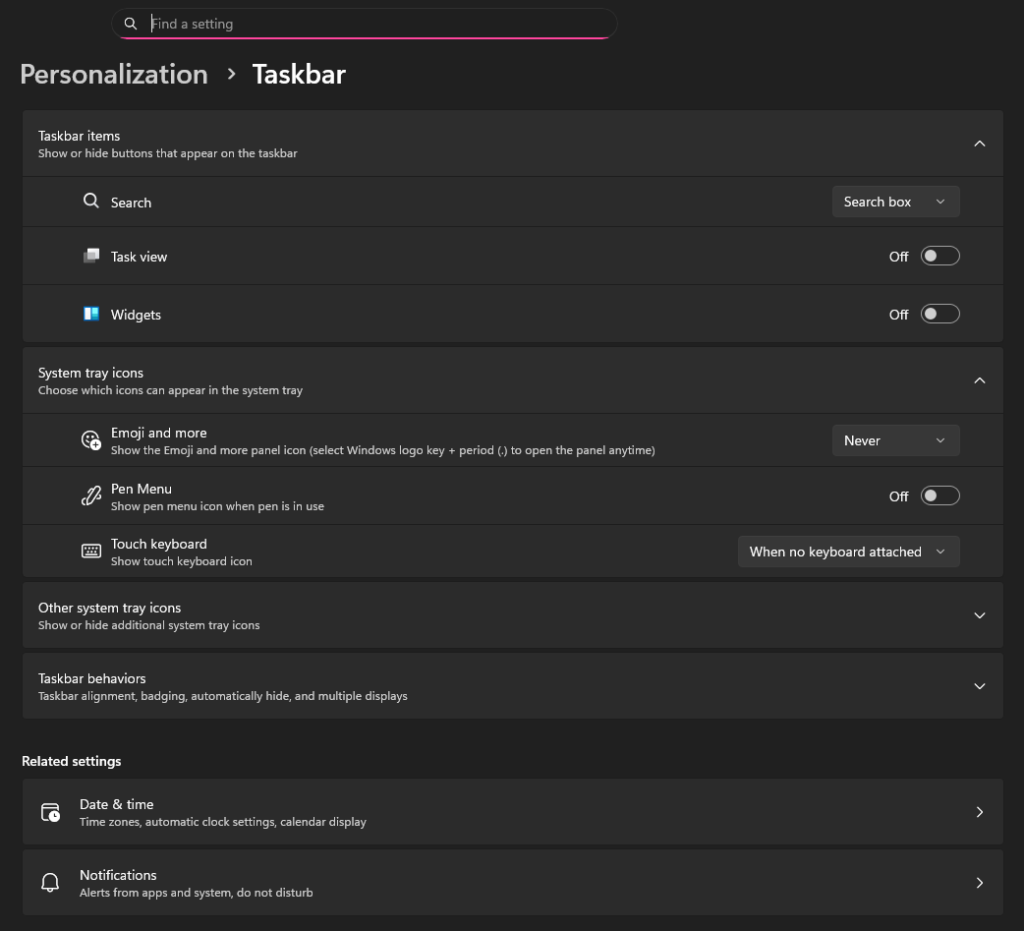
The taskbar in Windows 11 is centered by default, but you might prefer the classic left-aligned style or want to hide icons.

  • Why change it? It makes navigation feel more intuitive and reduces clutter.
  • How to do it:
    1. Right-click an empty spot on the taskbar and select “Taskbar settings.”
    2. Under “Taskbar behaviors,” change “Taskbar alignment” to Left.
    3. Toggle off “Show badges on taskbar apps” or “Automatically hide the taskbar” if you want more screen space.

This is one of those best Windows 11 customizations that instantly makes your desktop feel personalized.

Taskbar

4. Turn Off Visual Effects for Better Performance

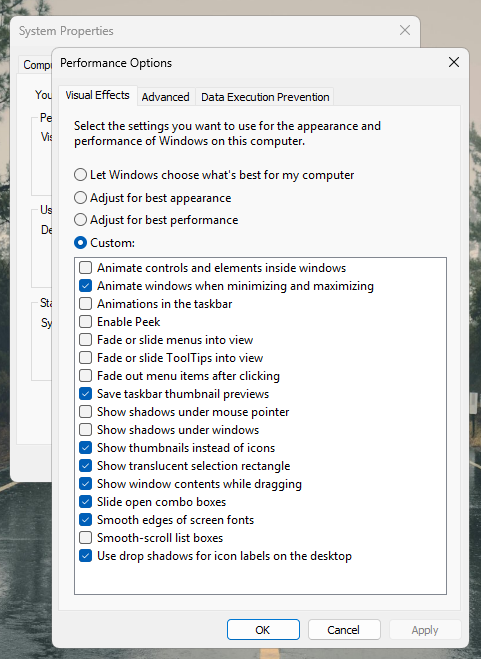
Windows 11’s animations and transparencies look fancy, but they can slow down older hardware.

  • Why change it? Disabling them improves responsiveness, especially on budget PCs.
  • How to do it:
    1. Search for “Performance” in the Start menu and select “Adjust the appearance and performance of Windows.”
    2. Choose “Adjust for best performance” or manually uncheck options like “Animate windows when minimizing and maximizing.”

If you’re gaming or using resource-heavy apps, this Windows 11 performance tweak is a game-changer.

best performance

5. Set Up Power and Sleep Settings for Efficiency

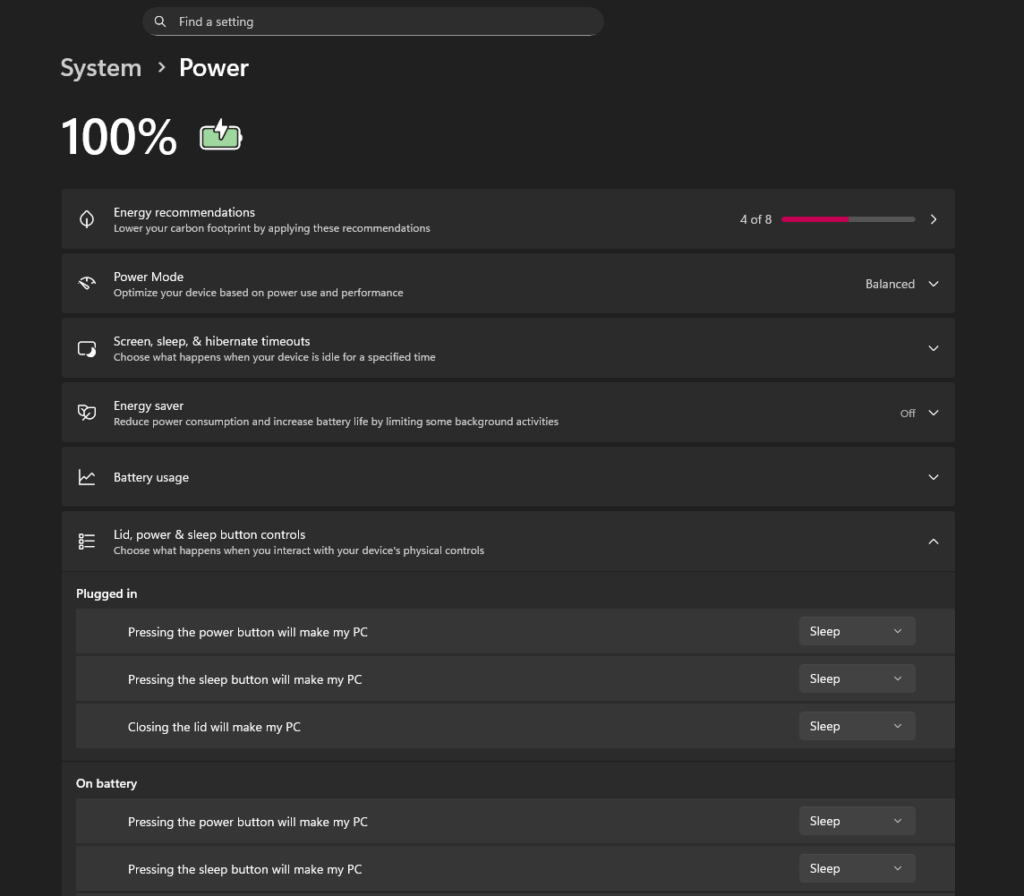
Default power plans might not match your usage—laptops drain fast, and desktops stay on too long.

  • Why change it? It saves energy and prevents unnecessary wear on your hardware.
  • How to do it:
    1. Go to Settings > System > Power & battery.
    2. Adjust “Screen and sleep” times (e.g., turn off screen after 5 minutes on battery).
    3. Click “Additional power settings” to choose a plan like “Balanced” or create a custom one.

For eco-conscious users, this is among the top Windows 11 settings for battery life.

6. Manage Update Settings to Avoid Interruptions

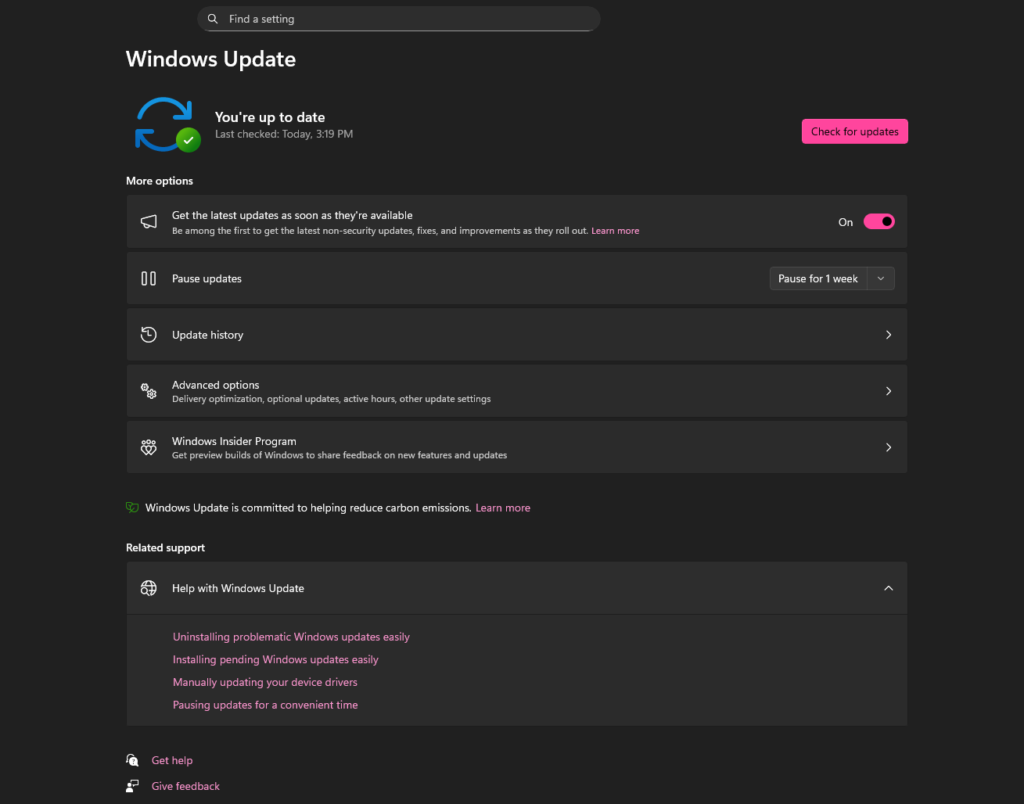
Windows 11 pushes updates automatically, which can restart your PC at the worst times.

  • Why change it? You get control over when updates happen, preventing mid-work reboots.
  • How to do it:
    1. Search for “Windows Update” in Settings.
    2. Set “Active hours” to match your schedule (e.g., 8 AM to 8 PM).
    3. Under “Advanced options,” pause updates if needed or opt into “Get the latest updates as soon as they’re available.”

Stay secure without the hassle—this Windows 11 update optimization keeps things smooth.

Update settings

7. Enable Dark Mode for Eye Comfort

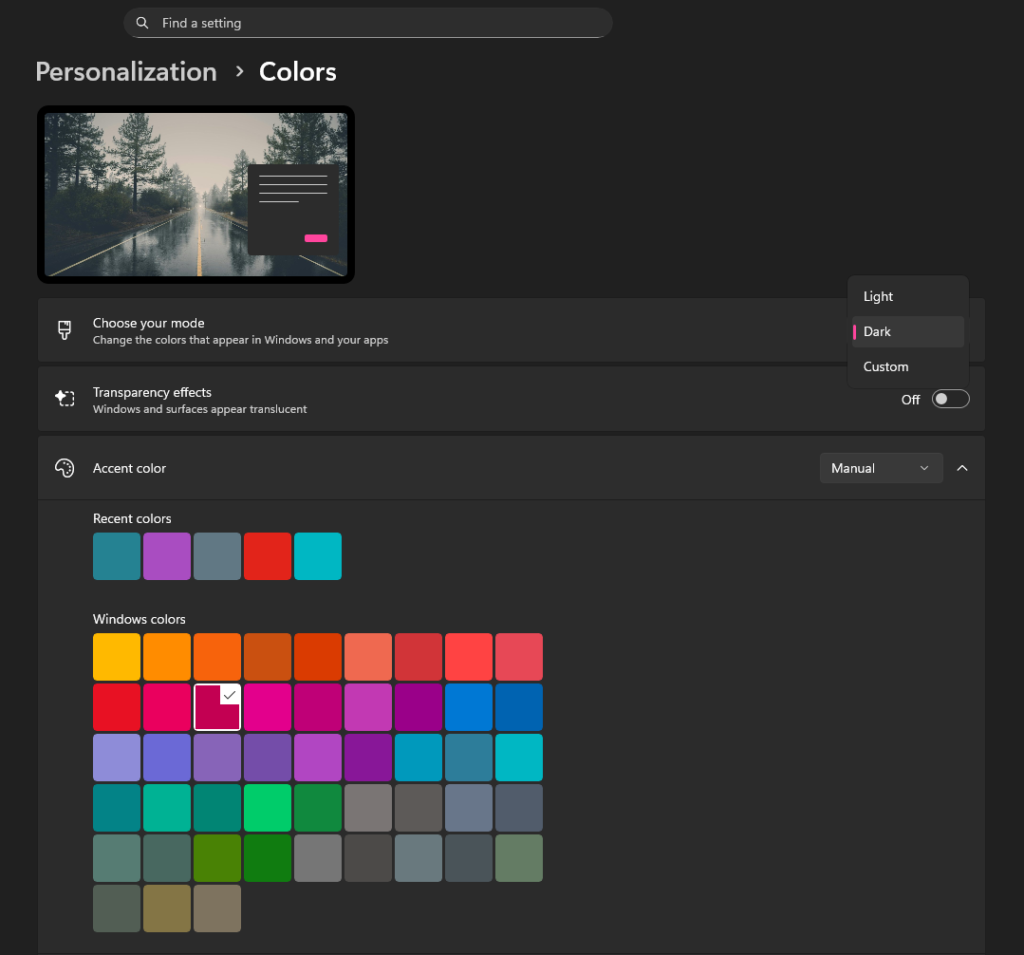
If you spend hours on your PC, switching to dark mode reduces eye strain.

  • Why change it? It’s easier on the eyes, especially at night, and looks modern.
  • How to do it:
    1. Go to Settings > Personalization > Colors.
    2. Choose “Dark” under “Choose your mode.”
    3. For apps, enable “Dark” in the same menu.

This simple Windows 11 dark mode tweak is perfect for beginners looking to customize visuals.

Colors settings

8. Remove Bloatware and Unwanted Apps

Fresh installs come with pre-installed apps like Candy Crush or Xbox that you might not want.

  • Why change it? It frees up space and declutters your Start menu.
  • How to do it:
    1. Go to Settings > Apps > Installed apps.
    2. Search for apps like “Microsoft Solitaire” or third-party promos.
    3. Click the three dots and select “Uninstall.”

Debloat your system with this best Windows 11 cleanup after installation.

Uninstall program

9. Configure File Explorer for Better Navigation

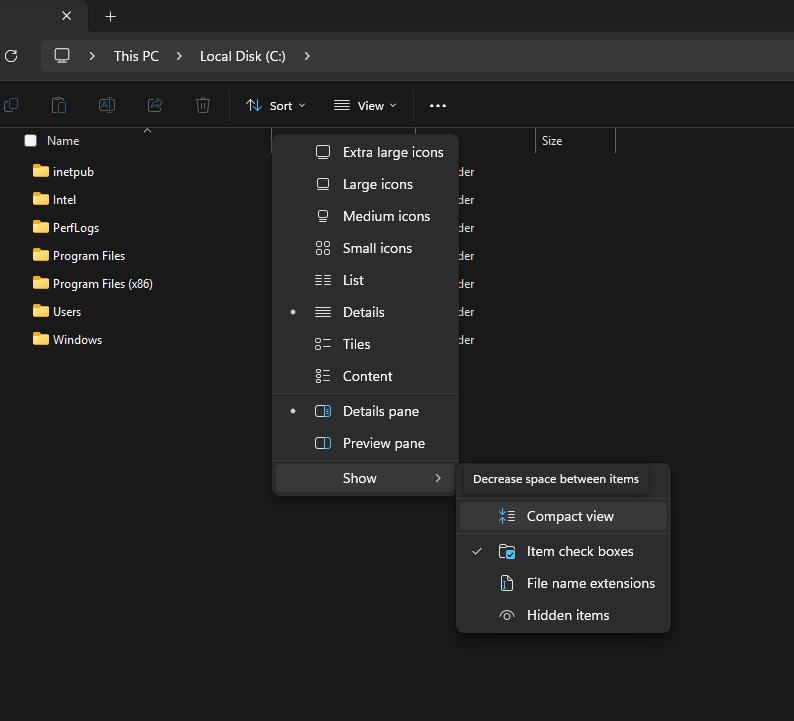
File Explorer’s defaults might hide extensions or show ads in the interface.

  • Why change it? It makes file management faster and ad-free.
  • How to do it:
    1. Open File Explorer, click View > Show > File name extensions (to see .exe, .jpg, etc.).
    2. In Options > View, uncheck “Hide extensions for known file types” and apply.
    3. To remove sync ads, search for “Folder options” and tweak as needed.

Enhance productivity with these Windows 11 File Explorer settings.

File explorer

10. Set Up Security Features Like BitLocker

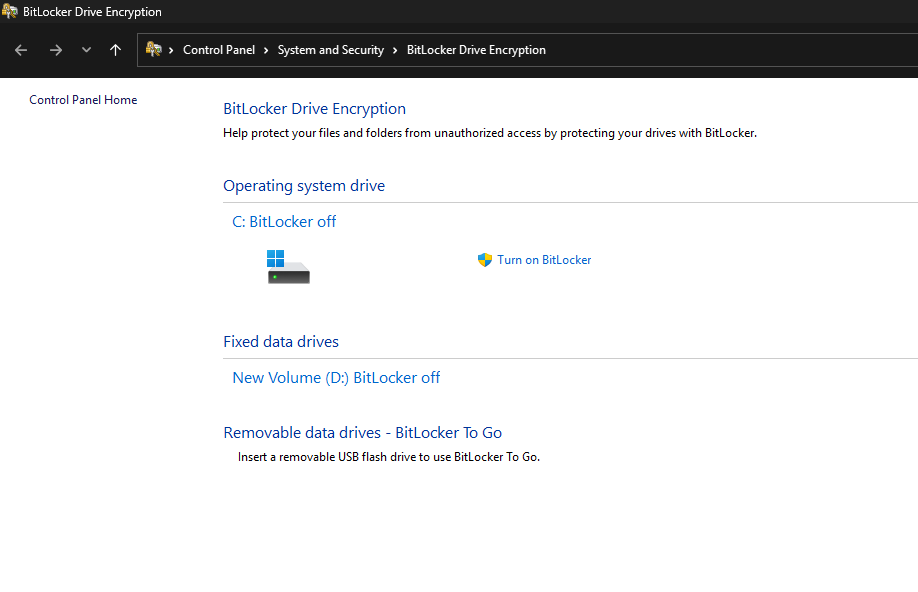
For added protection, enable encryption if your hardware supports it.

  • Why change it? It safeguards your data from theft.
  • How to do it:
    1. Search for “BitLocker” in Start.
    2. Turn it on for your drives (requires TPM 2.0, common in modern PCs).
    3. Back up your recovery key!

This is a must for Windows 11 security tweaks on laptops.

bit locker settings

Final Thoughts: Make Windows 11 Your Own

There you have it—the 10 best Windows 11 settings to change after installation for a smoother, more secure experience. These tweaks are beginner-friendly and can be done in under 30 minutes. Remember, everyone’s needs are different, so experiment and revert if something doesn’t feel right. If you’re dealing with specific issues like gaming or productivity, check out more advanced guides.

What tweaks have you tried? Drop a comment below! If this helped, share it with friends upgrading to Windows 11. Stay tuned for more tech tips in 2025. 🚀