Are you noticing your Windows 11 PC slowing down to a crawl, with the fan spinning like crazy and the system feeling unusually hot? These could be signs of high CPU usage—a common issue that drains your computer’s resources and impacts performance. High CPU usage happens when your processor is working overtime, often hitting 100% capacity, leaving little room for other tasks. This can lead to lag, freezes, crashes, and even reduced battery life on laptops.
Don’t worry if you’re not tech-savvy; this guide is designed for beginners. We’ll break down what causes high CPU usage in Windows 11, how to diagnose it, and step-by-step solutions to fix it. By the end, you’ll have your PC running smoothly again. We’ll cover everything in full detail, including tips to prevent it from happening in the future. Let’s dive in!
What Is High CPU Usage and Why Does It Matter?
Your CPU (Central Processing Unit) is the brain of your computer, handling all the calculations and instructions needed to run programs. When CPU usage spikes to high levels (like 90-100%), it means too many demands are being placed on it at once. This isn’t always a problem—short bursts during heavy tasks like video editing are normal—but constant high usage is a red flag.
Common symptoms include:
Slow response times when opening apps or browsing.
Loud fan noise as the system tries to cool down.
Overheating, which can damage hardware over time.
Reduced multitasking ability.
In extreme cases, blue screen errors or shutdowns.
In Windows 11, this issue can stem from new features like widgets, search indexing, or compatibility problems with older software. Fixing it not only boosts speed but also extends your hardware’s lifespan. According to experts, simple tweaks can resolve most cases without needing advanced tools.
How to Check CPU Usage in Windows 11
Before fixing the problem, you need to confirm it’s high CPU usage. Windows 11 has a built-in tool for this: Task Manager.
Step-by-Step Guide to Open Task Manager:
Right-click on the taskbar (the bar at the bottom of your screen) and select Task Manager. Alternatively, press Ctrl + Shift + Esc on your keyboard.
In the Task Manager window, click on the Processes tab if it’s not already selected.
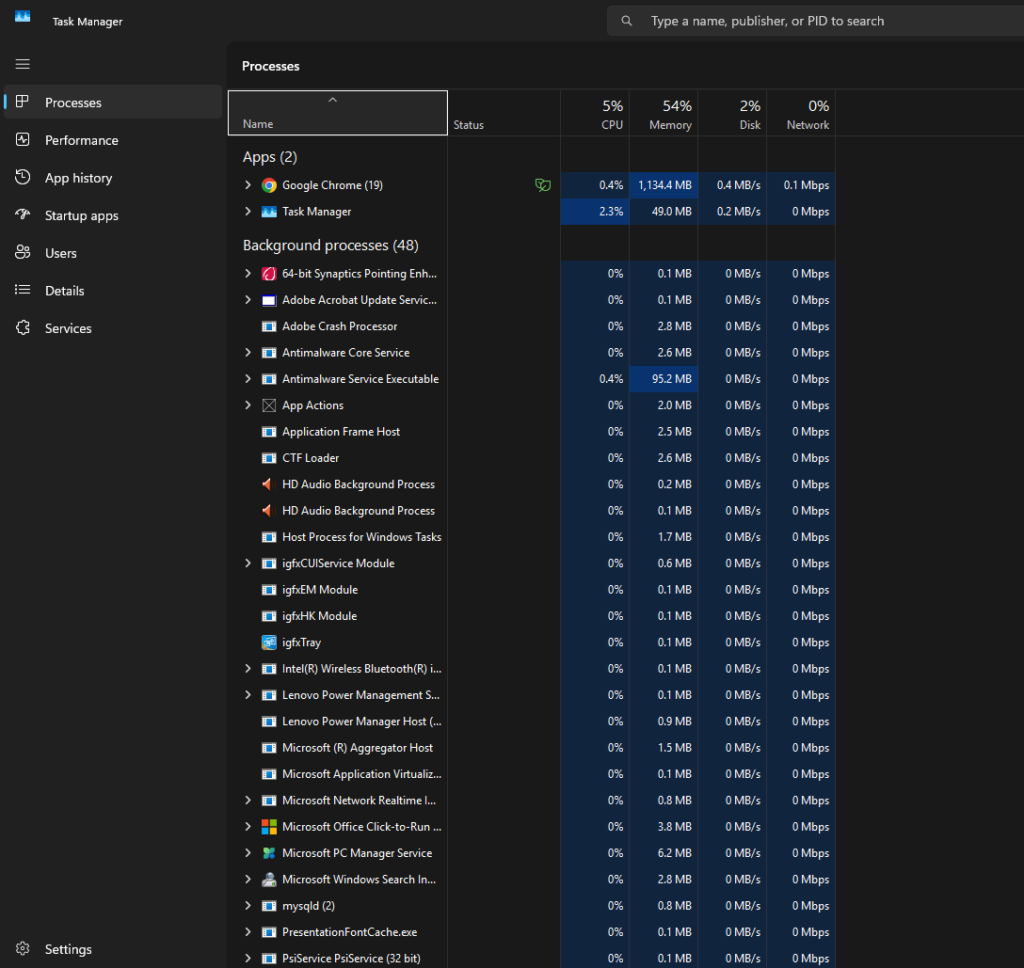
Look at the CPU column—it shows the percentage of CPU each app or process is using. Sort by clicking the CPU header to see the top offenders.
Switch to the Performance tab for a real-time graph of overall CPU usage. If it’s consistently at 80-100%, you’ve got an issue.
Here’s what Task Manager might look like when CPU is high:
If Task Manager itself shows high usage (sometimes up to 60-70%), don’t panic—it’s often just reporting the data. Now, let’s explore the causes.
Common Causes of High CPU Usage in Windows 11
Understanding the root cause helps you target the right fix. Based on user reports and tech guides, here are the most frequent culprits:
Background Processes and Apps: Too many programs running in the background, like antivirus scans or cloud syncs (e.g., OneDrive).
Malware or Viruses: Infections can hijack your CPU for malicious tasks.
Outdated Drivers or Software: Incompatible or old drivers, especially for graphics or network cards, can cause spikes.
Windows Updates and Indexing: Automatic updates or search indexing in Windows 11 can temporarily max out the CPU.
Startup Programs: Apps that launch automatically on boot eat up resources.
Power Settings: High-performance modes force the CPU to run at full speed unnecessarily.
Overheating: Dust buildup or poor ventilation makes the CPU throttle and work harder.
Specific Windows 11 Features: Issues with widgets, Cortana, or the new 24H2 update have been reported to increase usage.
Gaming-Related Problems: During games, poor optimization or background tasks can push CPU to 100%.
System File Corruption: Damaged Windows files from improper shutdowns.
If you’re on an older CPU like Intel i5-8400, compatibility with Windows 11 might exacerbate this.
Step-by-Step Solutions to Fix High CPU Usage in Windows 11
We’ll start with the easiest fixes and move to more advanced ones. Try them in order, and check Task Manager after each to see if usage drops. Always restart your PC after making changes.
1. Restart Your Computer
It sounds simple, but rebooting clears temporary glitches and closes stuck processes.
Click the Start button > Power > Restart.
Wait a minute, then check CPU usage. This fixes about 30% of cases.
2. Close Unnecessary Programs and Processes
Identify and end resource-hogging apps.
In Task Manager’s Processes tab, right-click high-CPU items (e.g., Chrome tabs or background apps) and select End task.
Be cautious: Don’t end system processes like “System” or “explorer.exe” unless you’re sure.
For browsers, use extensions like The Great Suspender to pause tabs.
If it’s a specific app like OBS Studio on Windows 11 24H2, update the software or roll back the OS update.
3. Update Windows 11
Outdated OS can cause inefficiencies.
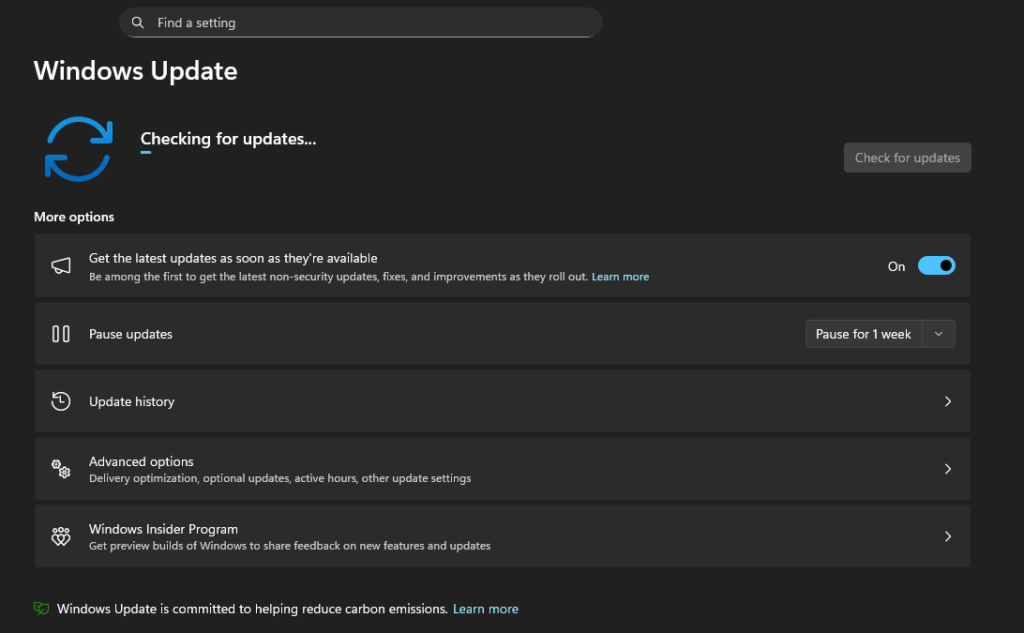
Go to Start > Settings (gear icon) > Windows Update.
Click Check for updates and install any available ones.
Restart if prompted.
Windows Update settings look like this:
4. Scan for Malware
Viruses are a top cause of unexplained high usage.
Open Windows Security: Start > Settings > Privacy & security > Windows Security > Virus & threat protection.
Click Scan options > Full scan > Scan now.
Alternatively, download free tools like Malwarebytes for a deeper check.
Run scans weekly to stay safe.
5. Update Drivers
Old drivers can conflict.
Right-click Start > Device Manager.
Expand categories like Display adapters or Network adapters.
Services tab: Check “Hide all Microsoft services” > Disable all > Apply > Restart.
7. Adjust Power Options
High-performance plans max out CPU.
Search for “Power Options” in Start.
Select Balanced or Power saver plan.
Click Change plan settings > Change advanced power settings > Processor power management > Set Maximum processor state to 99% (prevents turbo boosting).
Power options interface:
8. Check for Overheating and Clean Your PC
Heat forces the CPU to work inefficiently.
Use tools like HWMonitor (free download) to check temps—aim for under 80°C.
Clean dust from vents with compressed air.
Ensure good airflow; elevate laptops.
If overheating persists, reapply thermal paste (seek professional help if unsure).
9. Run System File Checker (SFC) and DISM
Fix corrupted files.
Right-click Start > Terminal (Admin) or Command Prompt (Admin).
Type DISM /Online /Cleanup-Image /RestoreHealth > Enter (wait 10-20 mins).
Then sfc /scannow > Enter.
Restart.
This repairs Windows integrity.
10. Additional Fixes for Specific Scenarios
Gaming High CPU: Close overlays (Discord, NVIDIA), update game launchers, or set affinity in Task Manager (right-click process > Set affinity > Limit cores).
Disable Superfetch/SysMain: Press Windows + R > services.msc > Find SysMain > Properties > Startup type: Disabled.
If All Else Fails: Create a new user account (Settings > Accounts > Other users > Add account) or reset Windows (Settings > System > Recovery > Reset this PC, keep files).
For server-like high usage, use Resource Monitor (search “resmon”) for deeper insights.
Preventing High CPU Usage in the Future
Keep Windows and drivers updated.
Limit startup apps.
Use reliable antivirus.
Monitor with Task Manager regularly.
Avoid downloading from untrusted sources.
Upgrade hardware if your PC is old (e.g., add RAM for better multitasking).
Conclusion
High CPU usage in Windows 11 can be frustrating, but with these detailed steps, most users see improvements quickly. Start with basics like restarting and updating, then move to scans and tweaks. If the issue persists, consider hardware problems or seek help from Microsoft Support. Your PC should now feel faster and cooler—happy computing!
If you have questions or tried these fixes, share in the comments below. For more Windows tips, subscribe to our blog!