Windows 11 is one of the most secure operating systems Microsoft has ever released, with built-in protections like TPM 2.0, Secure Boot, and Microsoft Defender. But out of the box, it also collects a fair amount of data to improve features and show personalized ads. If you’re concerned about your privacy or want to lock down your PC against threats, tweaking the right settings can make a big difference.
This beginner-friendly guide walks you through the most important Windows 11 privacy and security settings as of late 2025. We’ll explain what each one does, why it matters, and how to change it step by step. No tech expertise needed—just follow along!
What is TPM 2.0?
TPM 2.0, or Trusted Platform Module version 2.0, is a secure cryptoprocessor designed to perform cryptographic operations and enhance hardware-based security on computing devices. It’s typically implemented as a dedicated microcontroller chip on a computer’s motherboard, though it can also be integrated into the CPU or provided via firmware. The technology follows the ISO/IEC 11889 international standard and is used to verify that a device boots from trusted hardware and software, helping to protect against malware, unauthorized access, and tampering
How to Access Privacy & Security Settings in Windows 11
Most settings are in one place:
Press Windows key + I to open Settings.
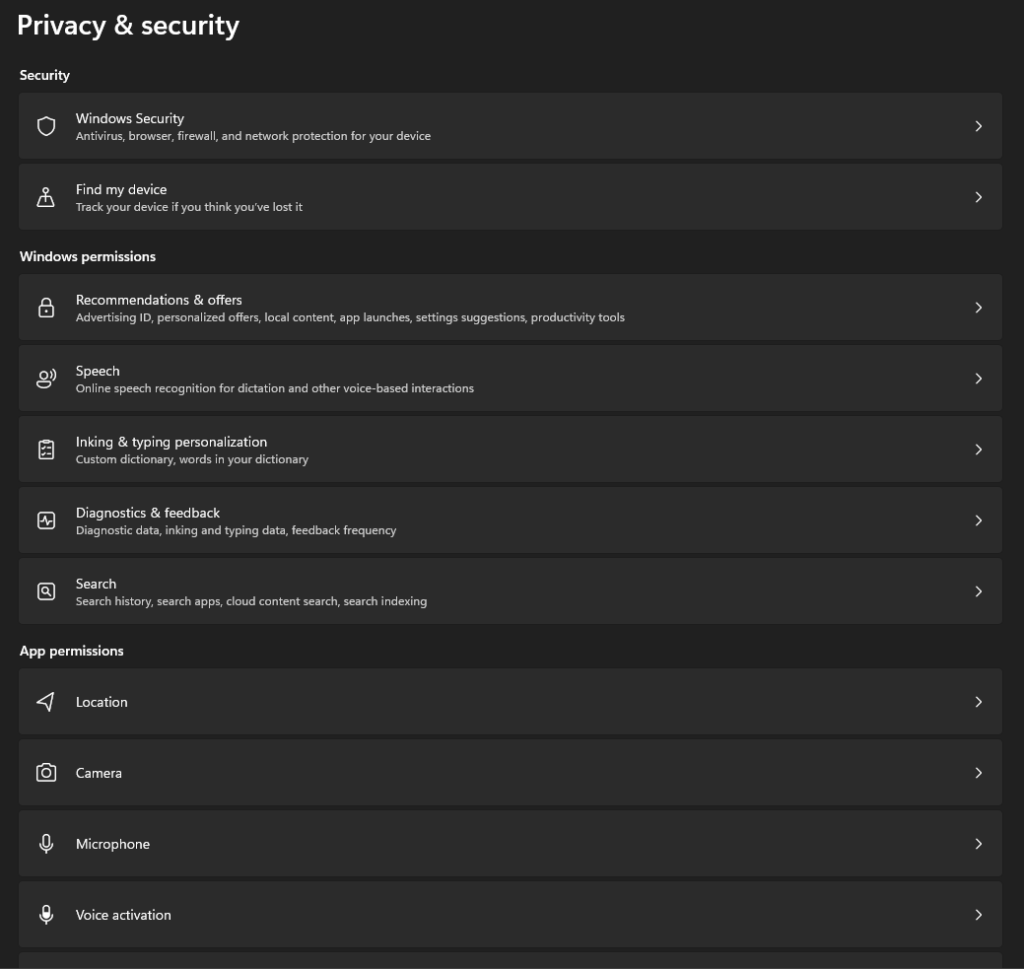
Click Privacy & security on the left sidebar.
From here, you’ll see sections like Windows permissions, App permissions, and Windows Security.
Let’s start with privacy.
Essential Windows 11 Privacy Settings to Change
These settings control what data Microsoft and apps collect about you.
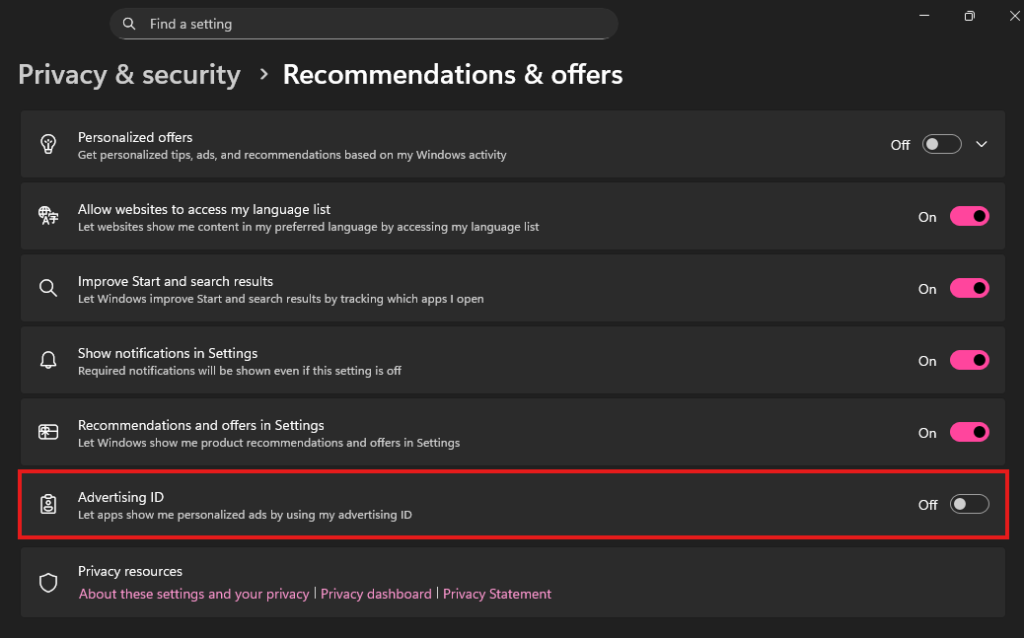
1. Turn Off Personalized Ads and Tracking (Recommendations & Offers)
Microsoft uses an Advertising ID to show targeted ads across apps and websites.
Go to Privacy & security > Recommendations & offers.
Turn off Advertising ID.
Also disable any options for personalized recommendations in Start menu or tips.
This stops ads from following you based on your activity.
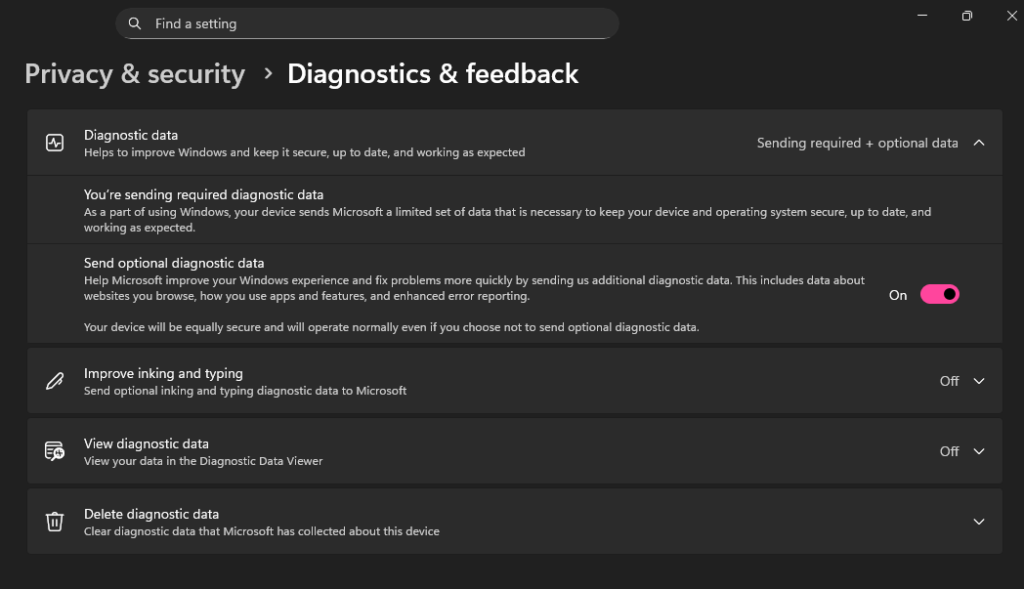
2. Limit Diagnostic Data
Windows sends diagnostic data to Microsoft to improve the OS. You can reduce it to the minimum.
Go to Privacy & security > Diagnostics & feedback.
Under Diagnostic data, select Required diagnostic data (turn off Optional diagnostic data if available).
Turn off Improve inking and typing (sends your handwriting/typing to Microsoft).
Disable Tailored experiences for personalized tips based on your data.
Delete existing diagnostic data if you want a clean slate.
Pro tip: Required data is needed for updates and security, but optional sends much more detail.
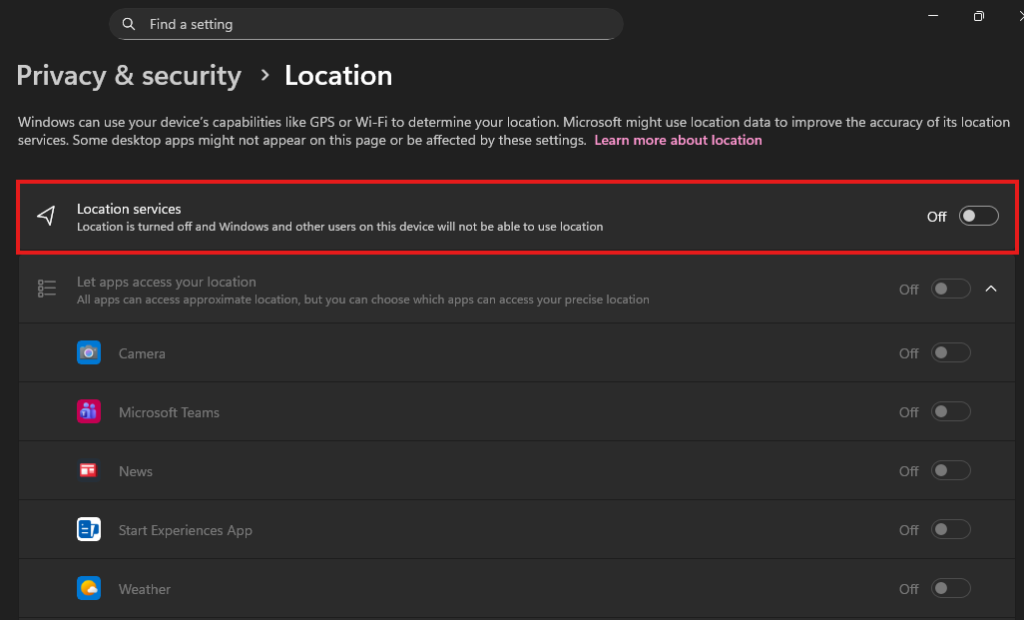
3. Disable Location Tracking
If you don’t need apps to know your location:
Go to Privacy & security > Location.
Turn off Location services.
Also set Let apps access your location to Off.
This blocks Windows and apps from tracking where you are.
4. Control Camera and Microphone Access
Prevent apps from spying through your webcam or mic.
Go to Privacy & security > Camera (or Microphone).
Turn off Let apps access your camera/microphone.
Review individual app permissions and revoke unnecessary ones.
For extra peace of mind, use physical covers on your camera.
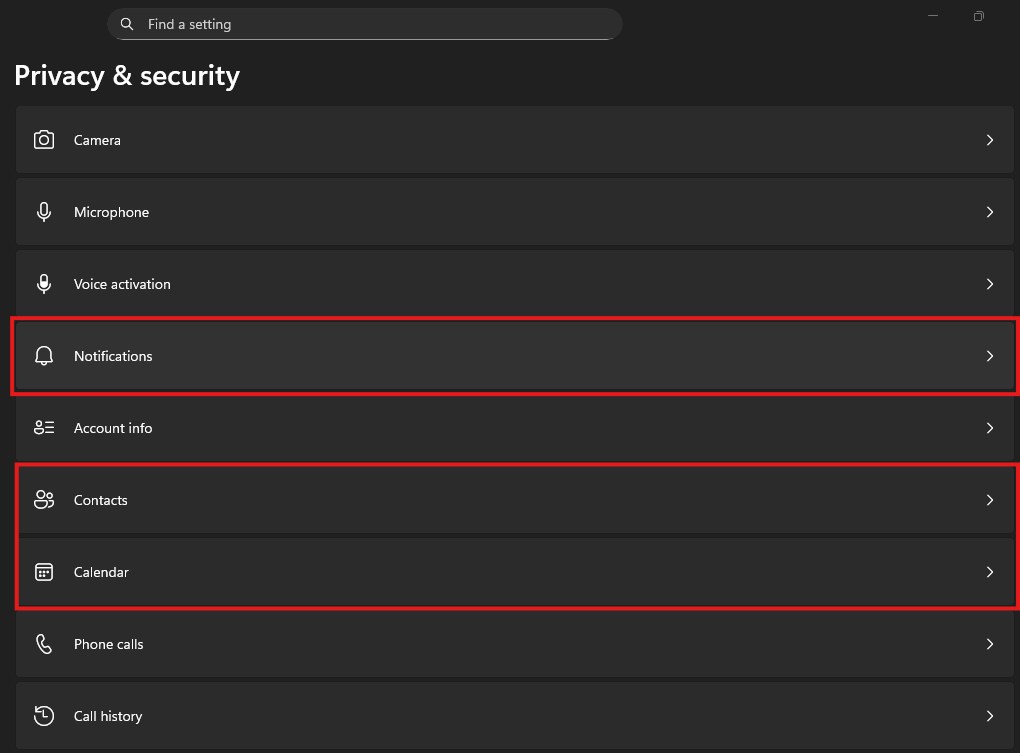
5. Manage Other App Permissions
Windows lets apps access things like contacts, calendar, or files.
In Privacy & security, scroll to App permissions.
Contacts, Calendar, Notifications Turn off access for anything you don’t use.
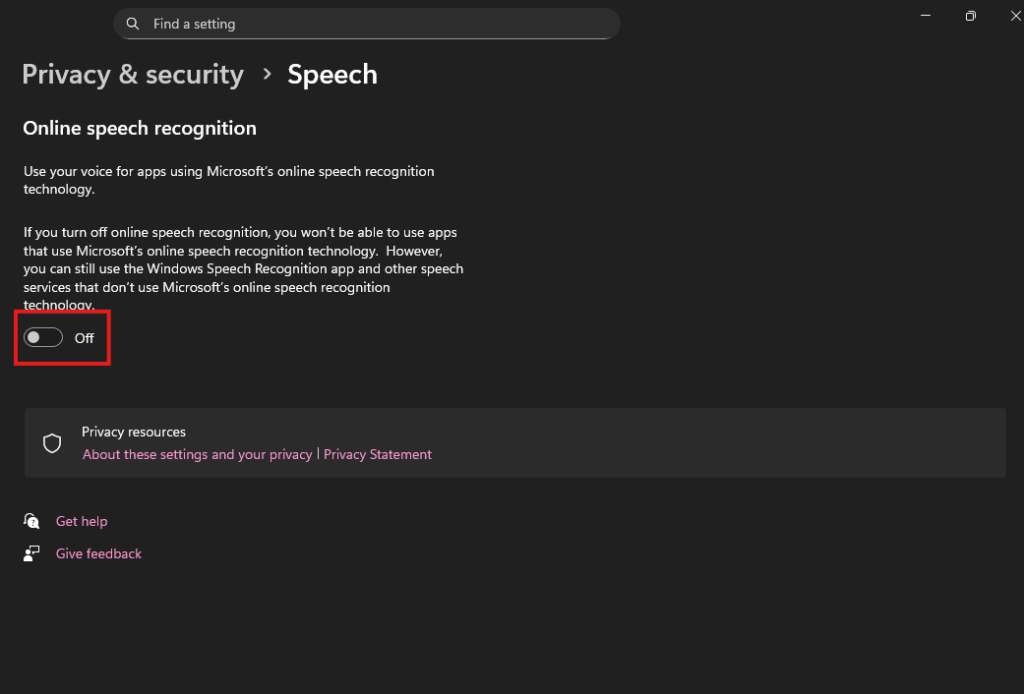
6. Stop Activity History and Online Speech Recognition
Go Privacy & security > Speech – Turn off Online speech recognition (prevents voice data from going to Microsoft servers).
These reduce tracking of what you do on your PC.
Bonus Privacy Tips
Use a local account instead of a Microsoft account (during setup or in Settings > Accounts).
Enable DNS over HTTPS for encrypted browsing: Settings > Network & internet > Your network > Properties > Edit DNS settings.
What is DNS?
DNS, or Domain Name System, is a fundamental internet protocol that acts like a phonebook for the web. It translates human-readable domain names (e.g., “example.com”) into machine-readable IP addresses (e.g., 192.0.2.1) that computers use to locate and connect to websites or services. This hierarchical and distributed system prevents users from having to remember numeric addresses, making the internet more accessible.
HTTPS, or Hypertext Transfer Protocol Secure, is the encrypted version of HTTP, the protocol used for transferring data between web browsers and servers. It adds a layer of security by encrypting the data in transit, protecting it from eavesdropping, tampering, or man-in-the-middle attacks.
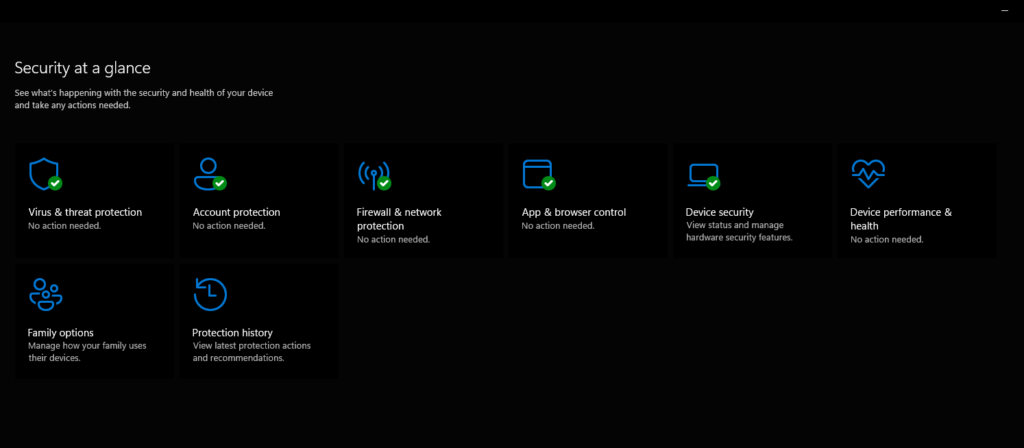
Windows 11 has powerful built-in security—make sure it’s fully activated.
1. Open Windows Security App
Search for Windows Security in the Start menu.
Check all sections are green (protected).
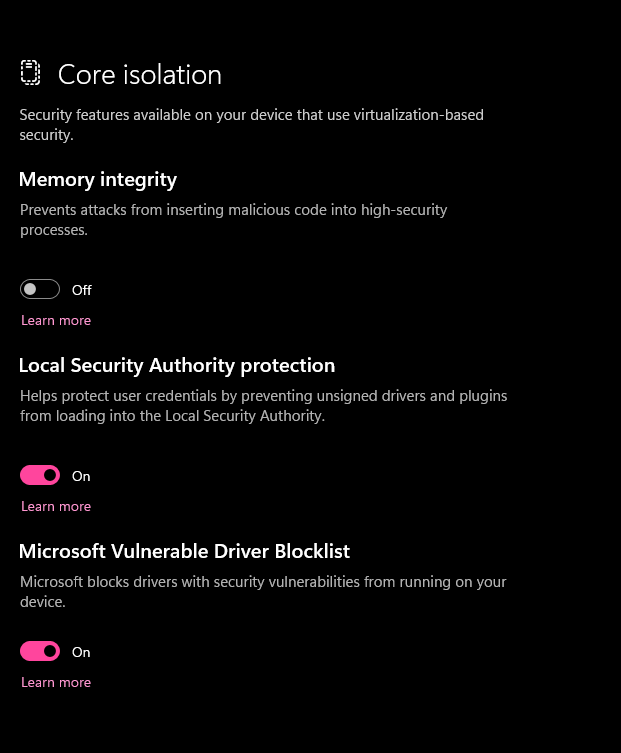
2. Enable Core Isolation (Memory Integrity)
This uses virtualization to protect against advanced malware.
In Windows Security, go to Device security > Core isolation details.
Turn on Memory integrity.
It might affect some older drivers, but it’s worth it for security.
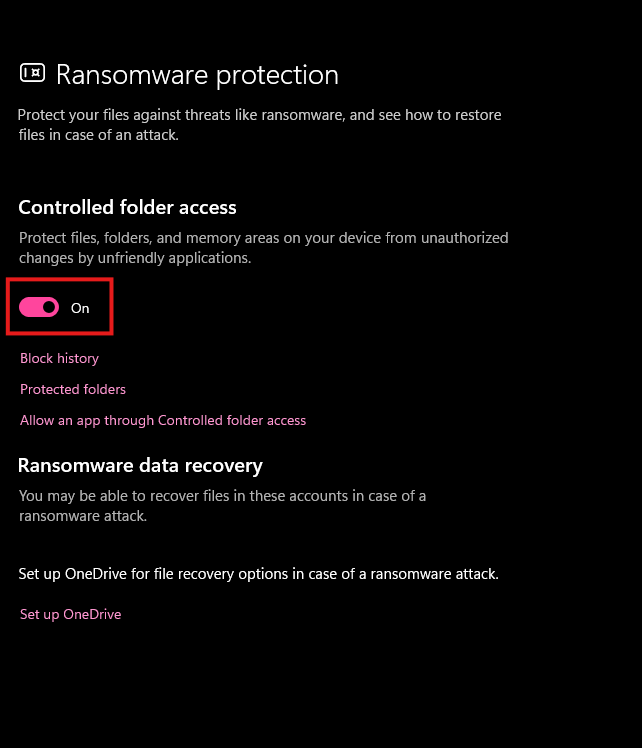
3. Turn On Ransomware Protection
Protects your files from encryption attacks.
In Windows Security > Virus & threat protection > Manage ransomware protection.
Enable Controlled folder access and add protected folders.
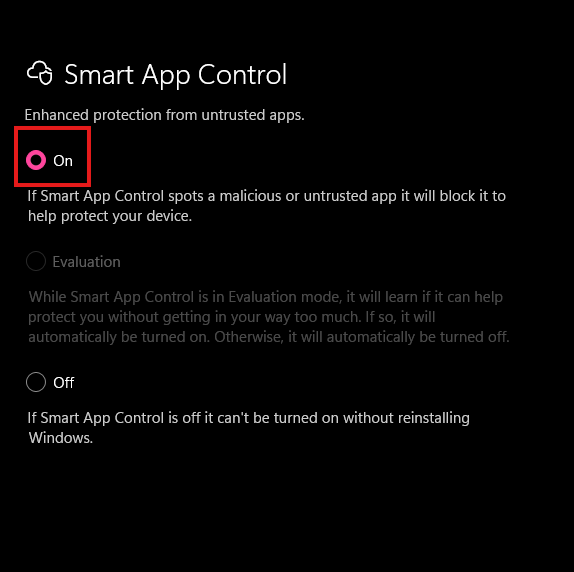
4. Activate Smart App Control
Blocks untrusted apps automatically (great for beginners).
In Windows Security > App & browser control > Smart App Control settings.
Set to On (available on clean installs or after reset).
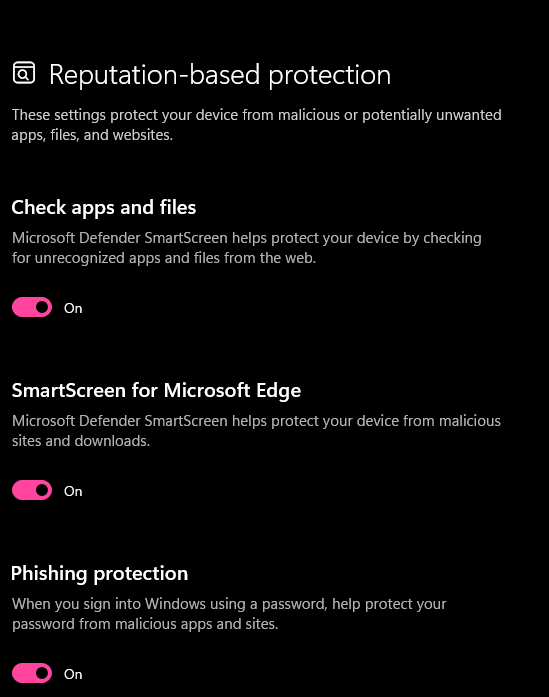
5. Enable Reputation-Based Protection
In Windows Security > App & browser control > Reputation-based protection.
Turn on all options: Check apps and files, SmartScreen for Edge, Block potentially unwanted apps, and Phishing protection.
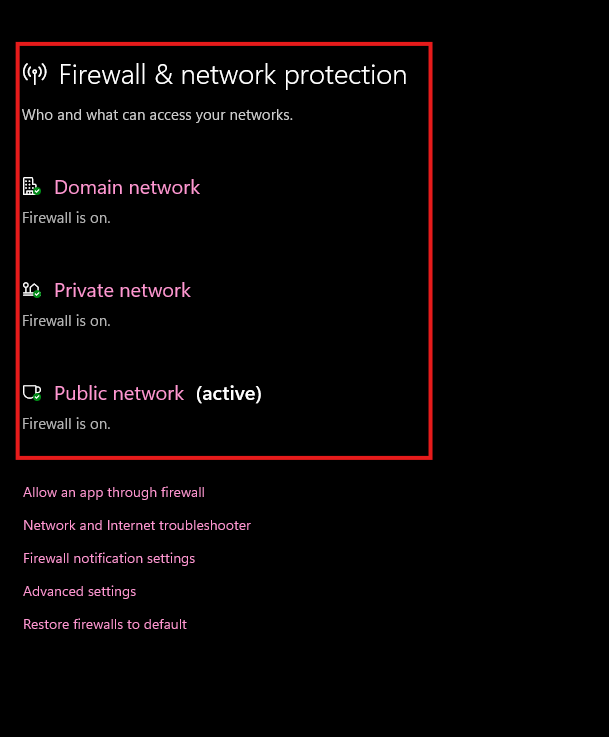
6. Firewall and Network Protection
In Windows Security > Firewall & network protection.
Ensure firewall is on for all network types (Private, Public).
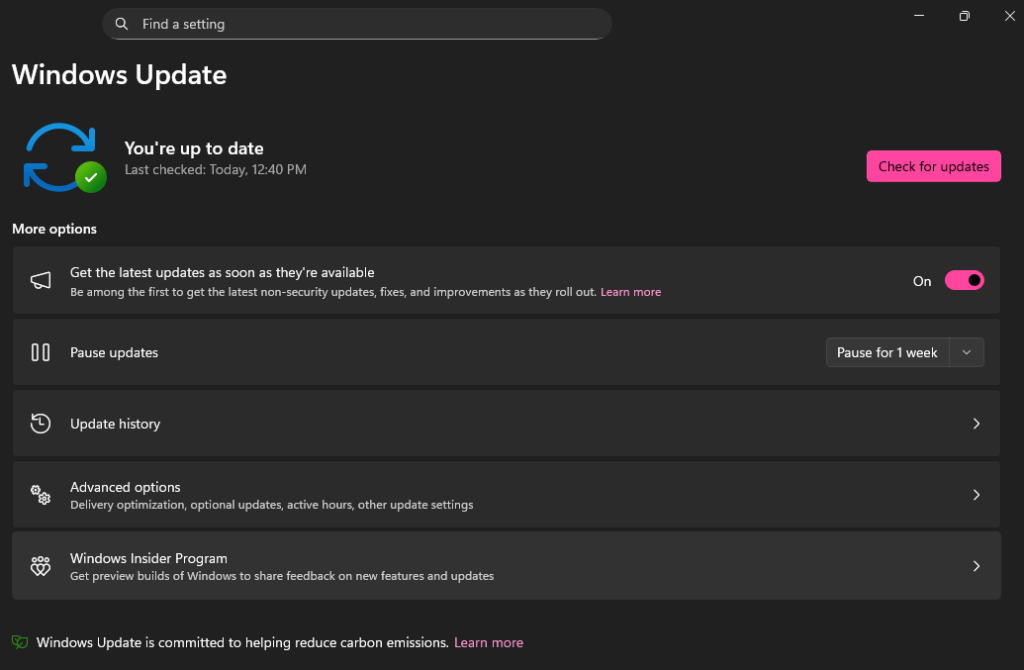
7. Keep Windows Updated
The #1 security tip!
Go to Settings > Windows Update.
Check for updates regularly and install them.
Enable automatic updates for the best protection.
Final Thoughts: Stay Safe and Private on Windows 11
By adjusting these settings, you’ll significantly reduce data collection and boost your PC’s defenses against malware, hackers, and privacy leaks. Windows 11 is already secure by default in 2025, but these tweaks make it even better—especially with features like Administrator Protection and enhanced phishing guards from recent updates.
Remember, no system is 100% invincible. Use strong passwords (or Windows Hello PIN/biometrics), avoid suspicious downloads, and consider a reputable antivirus if needed (though Defender is excellent).